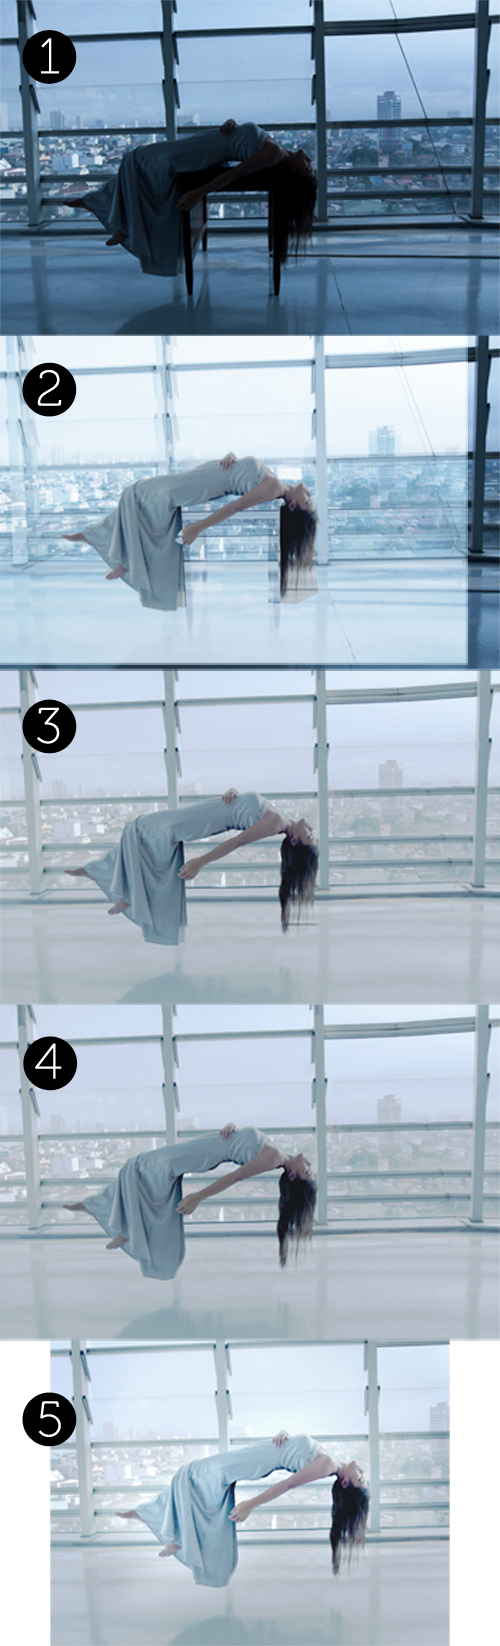
1) Getting the right exposure and picking the best shot
Firstly, after setting everything up; I couldn’t figure out why the studio lights wouldn’t flash 80% of the time. And when it came to picking the best photos, all the good poses happened to be in the ones where the lights didn’t flash :/ I’m aware that a #1 rule of thumb is to get the best exposure so less time would be spent on correcting it after. But alas, I had to break this rule as I stuck by my model’s best pose — which wasn’t lit as well as I would’ve liked. Hence, I fixed the underexposure with Curves (command/CTRL+M) on Photoshop.
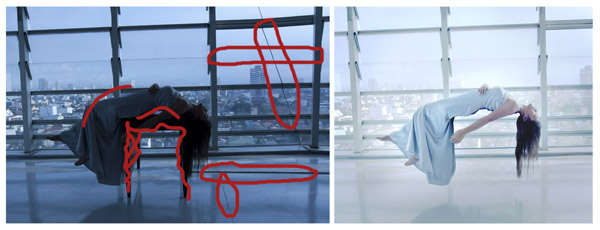
2) Erasing the table
FACEPALM MOMENT: With all the excitement during the shoot, I forgot to take that one crucial shot without the table. Fortunately, I did have one shot, however it was slightly zoomed in. So I placed this over the original photo and scaled it down ‘til it fit right. Finally, I was then able to erase out the table from under her.
3) Editing out unnecessary details
Next, I cloned out distracting elements such as the lines and crevice on the floor, and the diagonal line at the rightmost window (+ added a horizontal glass edge to be uniform with the first two column of windows), then lots of other zoom-ins and minor editing. It’s the details, yo!
4) A more convincing levitation
…because physics! To achieve a more convincing gravity-defying act, I “pushed” my model’s knees down and other tweaks with the liquify tool to make her body look more arched.
5) Cropping & final edits
Finally, I wanted it to look like she was emanating radiance so I brightened up the photo a tiny bit, then added a slight vignette. Lastly, I used the dodge tool for that extra glow on her dress.
That’s it! Hope you guys learned something from this. 🙂
Click here to view the final piece in all its glory!
Want to go behind-the-scenes of this shoot with me? Click here!


1 Comment