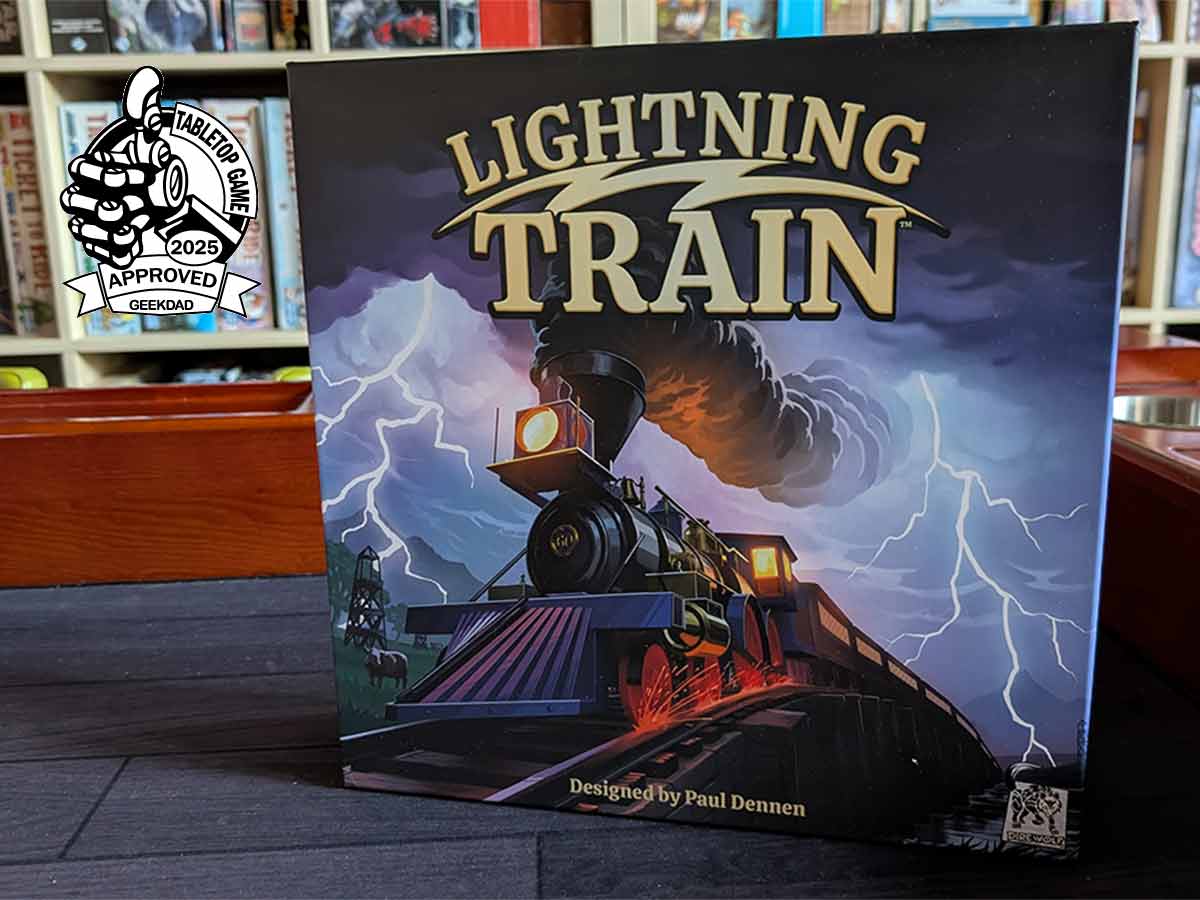
Except maybe dungeon crawlers, few genres seem to attract game designers like trains. Now, Paul Dennen, designer of GeekDad Game of the Year Dune Imperium and GeekDad Game of the Year finalist Clank is bringing his spin to train building games with Lightning Train.
What Is Lightning Train?
Lightning Train is a game for 1-4 players, ages 10 and up, and takes about 120 minutes to play. It’s currently available at your friendly neighborhood game store or other fine retailer.
Lighning Train was designed by Paul Dennen and published by Dire Wolf Games, with illustrations by Clay Brooks, Derek Herig, Kenan Jackson, and Raul Ramos.
Lightning Train Components
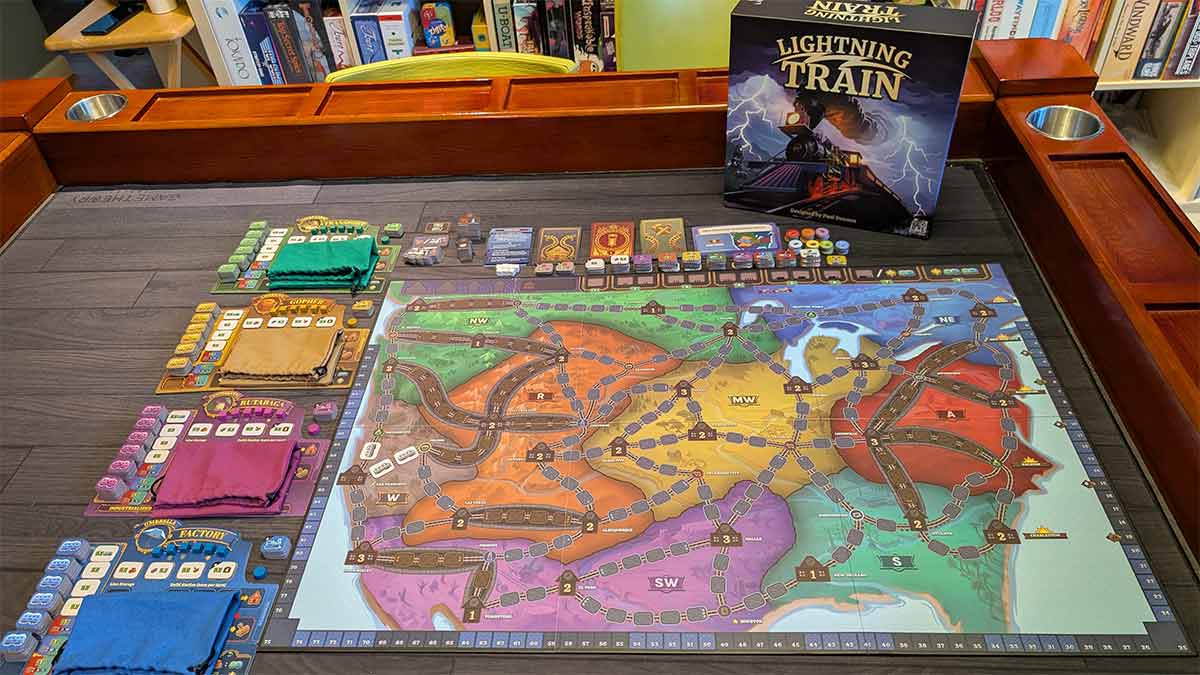
Inside the box, you’ll find:
1 double-sided board
1 Lightning Train market token
7 neutral station markers
84 market chips
42 goods tokens (6 each in 7 categories)
8 loan chips
27 station tokens (15 large, 12 small)
6 delivery tokens
2 delivery/contract tokens
6 $1 + chips
25 mogul cards
20 action cards
15 production cards
10 setup cards
4 sets of player components, 1 in each of 5 colors:
- Company board
- Go Public board
- Industrialize board
- Score marker
- 6 station markers
- Company bag
- 48 basic trains
- 6 locomotives
- Helper card
- 4 power chips
- 7 starting chips
In addition, there are some components for the solo and 2 player game:
- Die
- Rival turns helper card
- 4 builder tokens
- 8 region cards
- 2 dynamite tokens
Dire Wolf has been making really nice games for some time now, so you’d expect great components, and Lightning Train doesn’t disappoint.
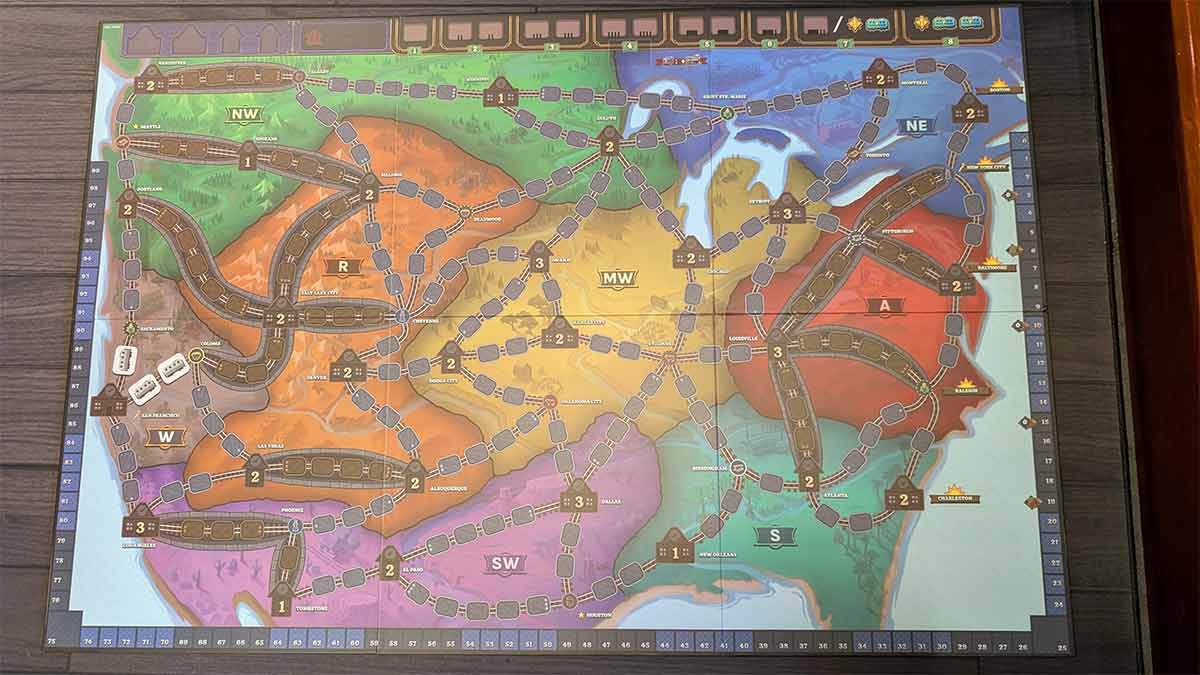
The board is basically a map of the US and southern Canada. Well, sort of. If you’re familiar with Ticket to Ride, you’ll know that they had to occasionally take liberties with geography to get things to fit. Lightning Train does as well, but at a whole different level. I’ll just say that if you’re a geography nerd, this board is going to drive you crazy. Still, the layout they made works, and it nicely fits all of the components, which in the end was (rightfully, I think) the right choice. Similar to Ticket to Ride, the board primarily shows the routes between cities on which you’ll build your train routes. Unlike TTR (and I should mention here that there are enough similarities in the games that anyone who has ever played TTR is going to immediately make all kinds of connections, and that definitely applies to me) there is only a single route between cities, and since building routes is only one of several things you can do in this game, the board also includes icons for stations, for placing goods to be delivered, for routes through mountains, and much more.
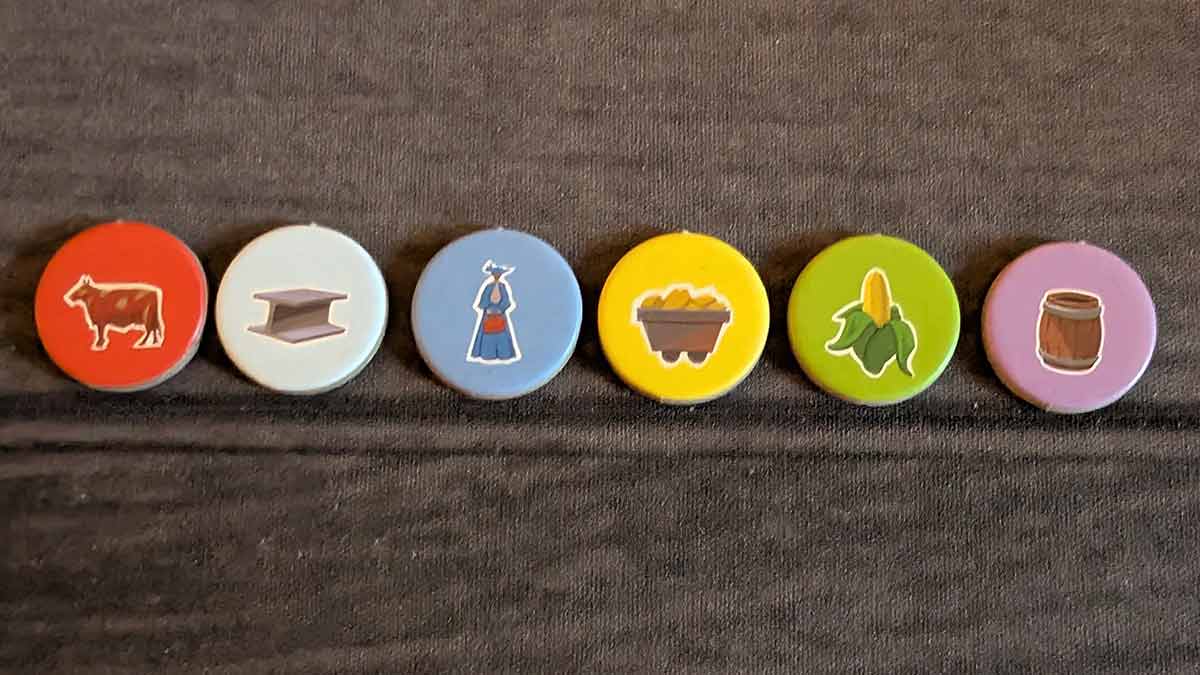
The aforementioned goods to be delivered are represented by small round cardboard tokens, simply illustrated with the good.
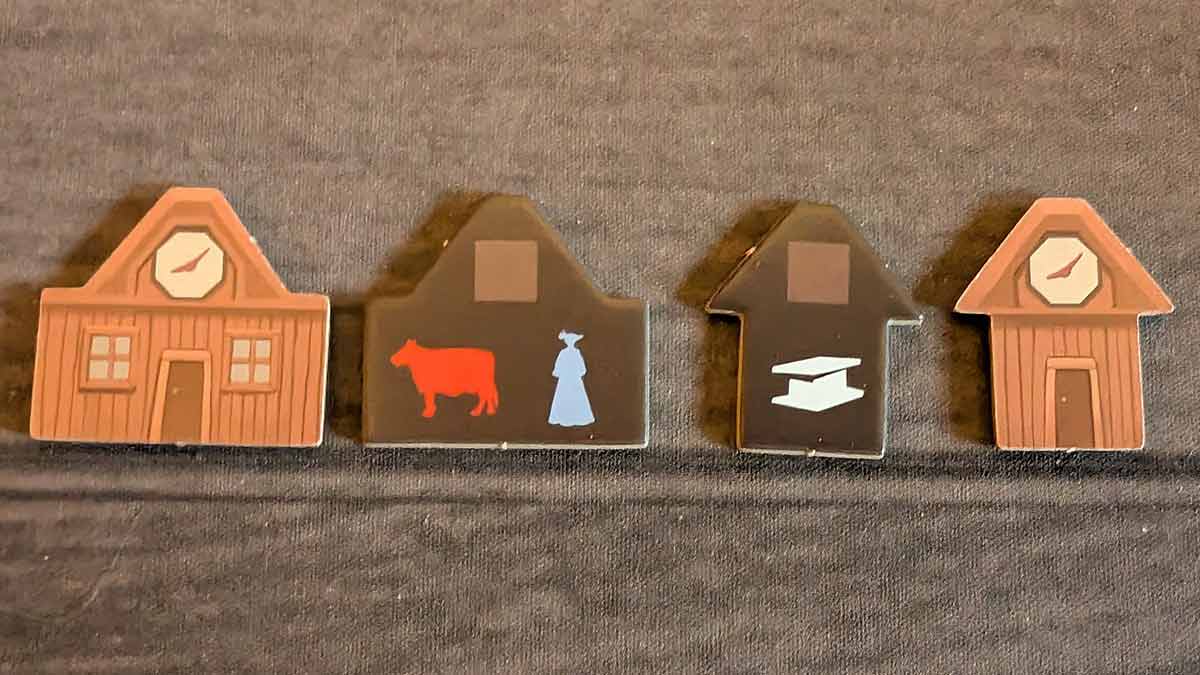
The station tokens come in two sizes, small and large, both die-cut cardboard to fit the spaces indicate on the map. Each has an illustration of an old train station on one side, and either one or two goods that the station needs on the other.
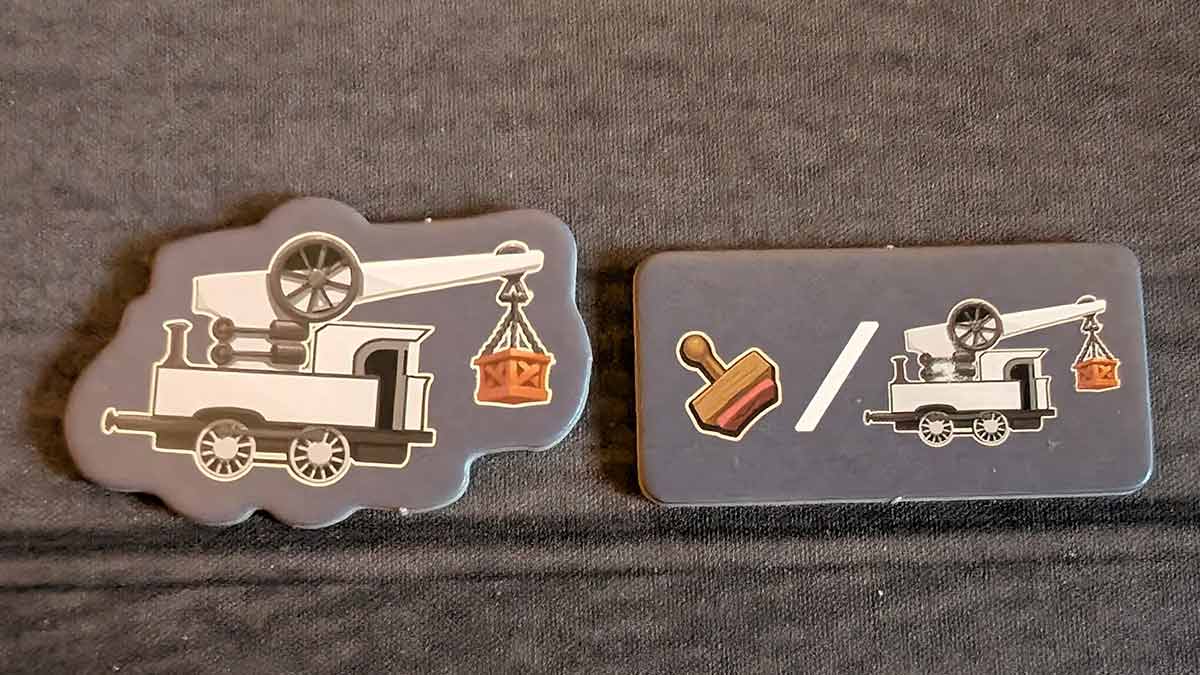
The 6 delivery and 2 delivery/contract tokens are used as a way to help all players early in the game, and to give a slight advantage to the third and fourth player to offset going last. They are, like most of the rest of the components, double-sided cardboard.
What truly makes Lightning Train unique is that it takes two of the most common elements of train games–markets and rail lines–and combines them in to one. But it also adds in a bag building element, so most of the rest of the cardboard tokens are all identically-sized rectangular tokens that can be added to and drawn from the player bags.
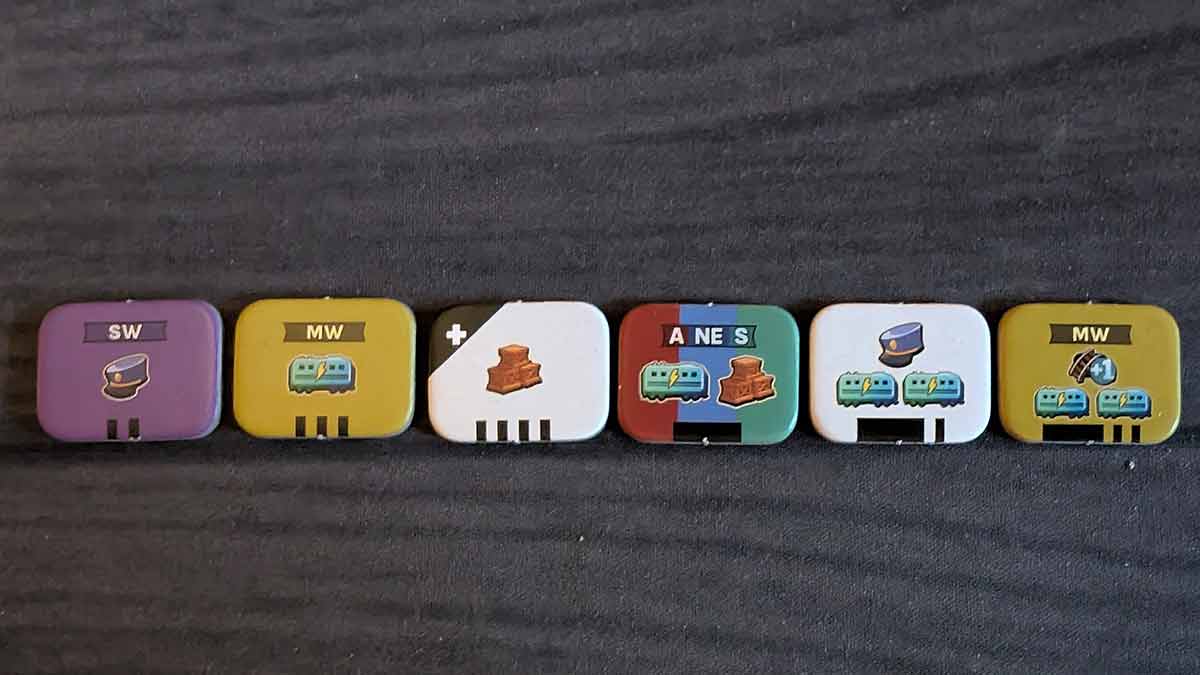
The biggest set of these for shared use by all players are the market tokens. These display some kind of benefit or power to be used in the game (I’ll get into detail on that below) and also a somewhat unique pricing system. The market row at the top of the board has spaces for tokens of differing values, and black lines indicating the cost: 2 through 8. But, they aren’t simply long sets of lines that woud require counting. Instead, the two, three, and four-cost tokens (and matching space on the board) have sets of lines, but the 5-cost one is instead one solid block. The six adds a line to that block, as does the seven. (The one and eight-cost spots are special, but we’ll get to that.) This is a rather brilliant system that makes it easy to know the cost of these blocks at a very quick glance.
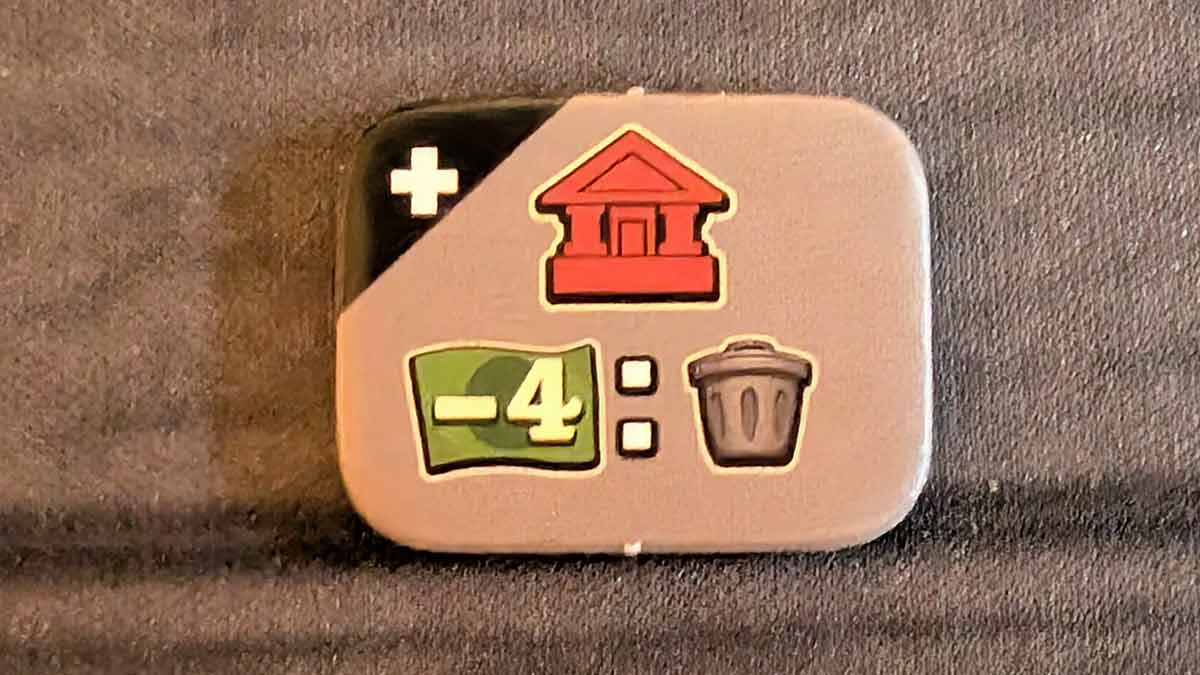
Of the same size are the bank loan chips and the $1 + chips.
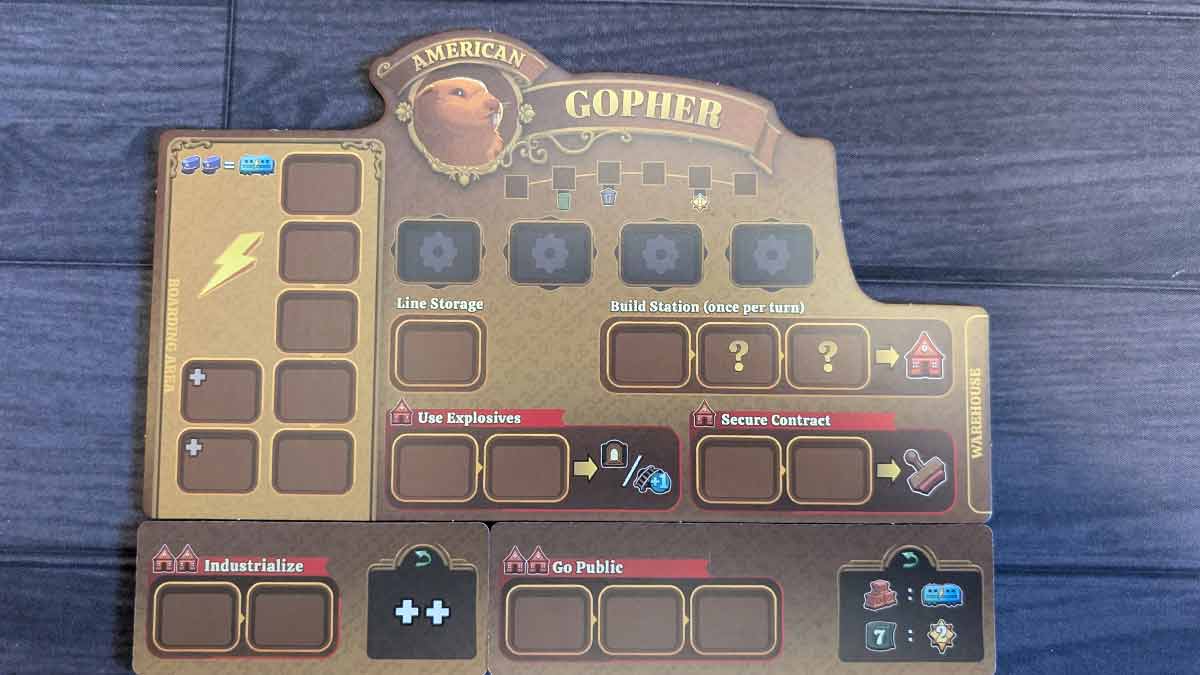
The player components consist of a heavy cardboard, single-layer player board with two additional upgrade boards that fit below it. Both of these–industrialization and going public–have spaces on one side to build those upgrades and then a reverse side to show what happens when players upgrade.
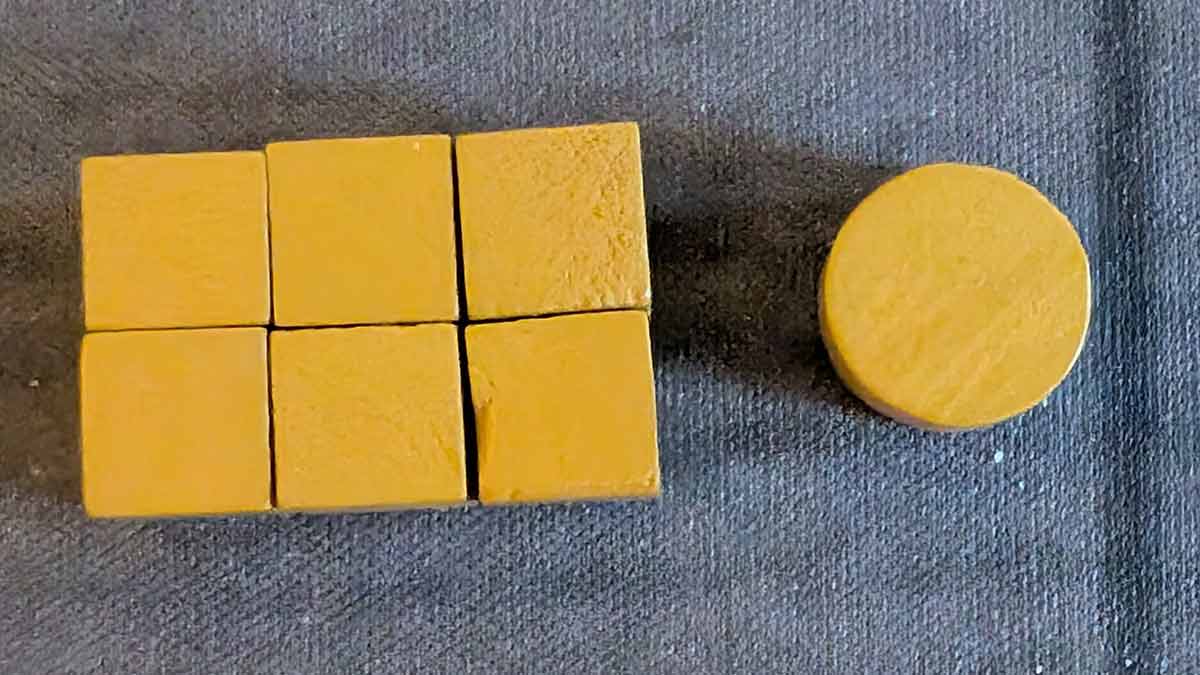
There’s a wooden score marker and six wooden cubes for marking stations.

Again, one of the game’s main mechanics is bag building, so of course there’s a cloth bag for each player.
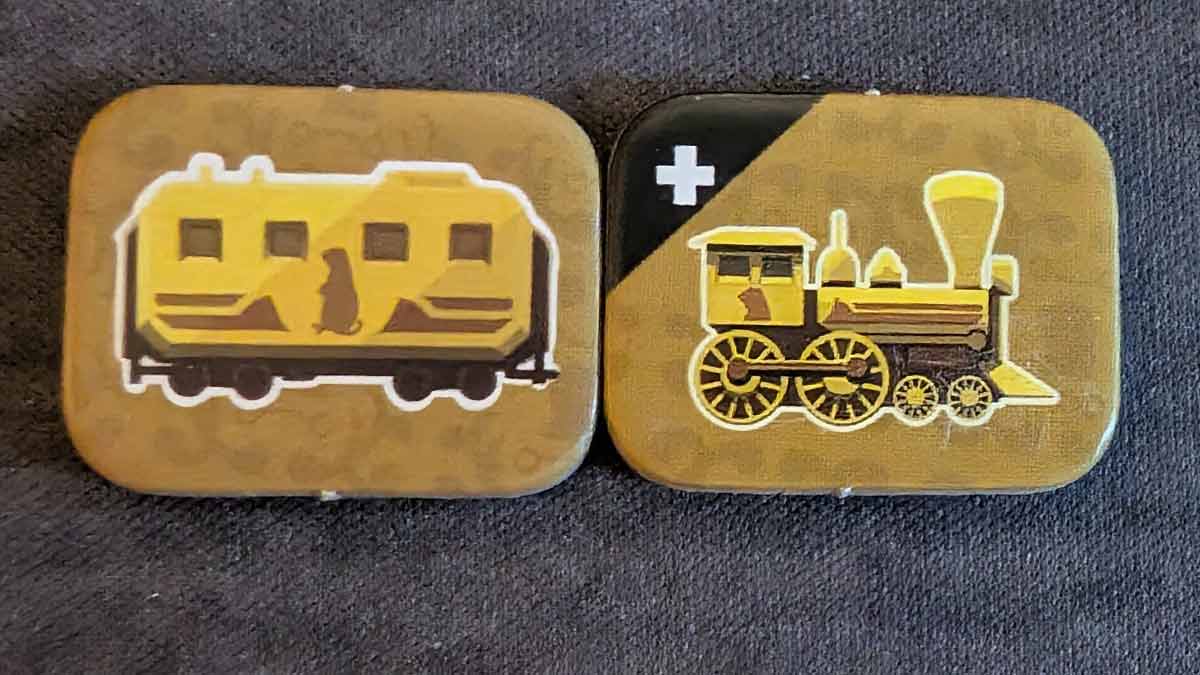
Each player also needs train cards to build those routes. They get 48 basic trains (that look like passenger cards) and 6 locomotives. These are cardboard tokens of the same size and shape as the market tokens.
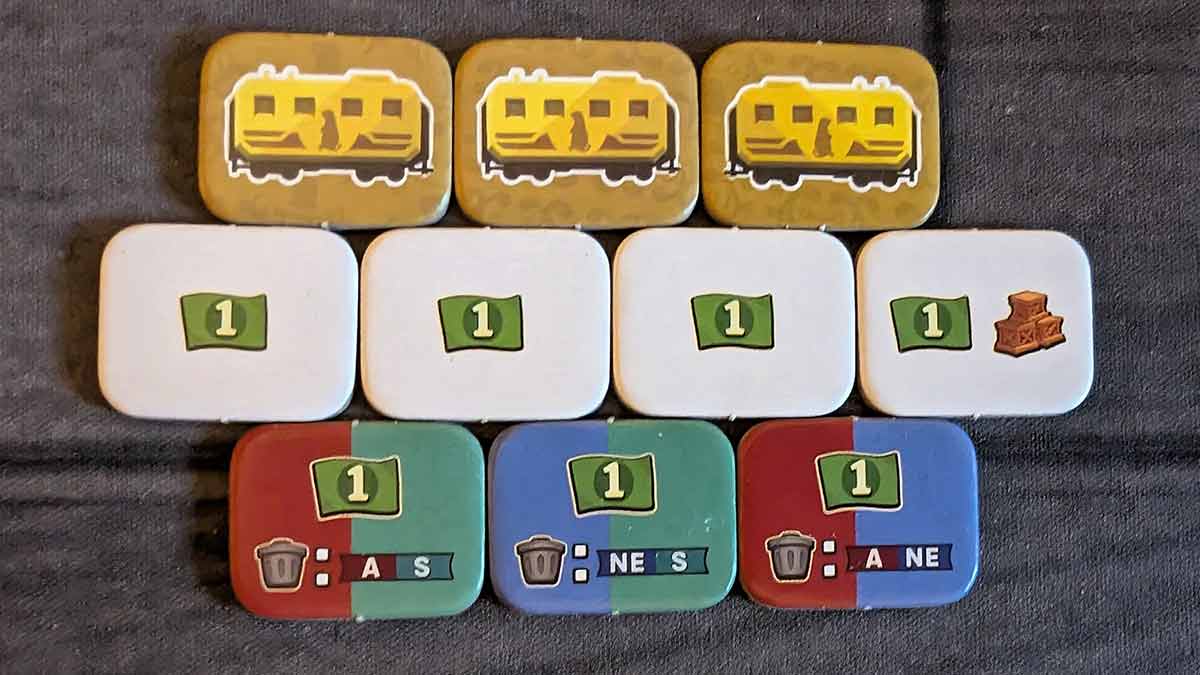
Every bag builder needs a starting set of tokens. Here. that’s represented by three market tokens and four $1 tokens. Players also put three train tokens in their starting bag.
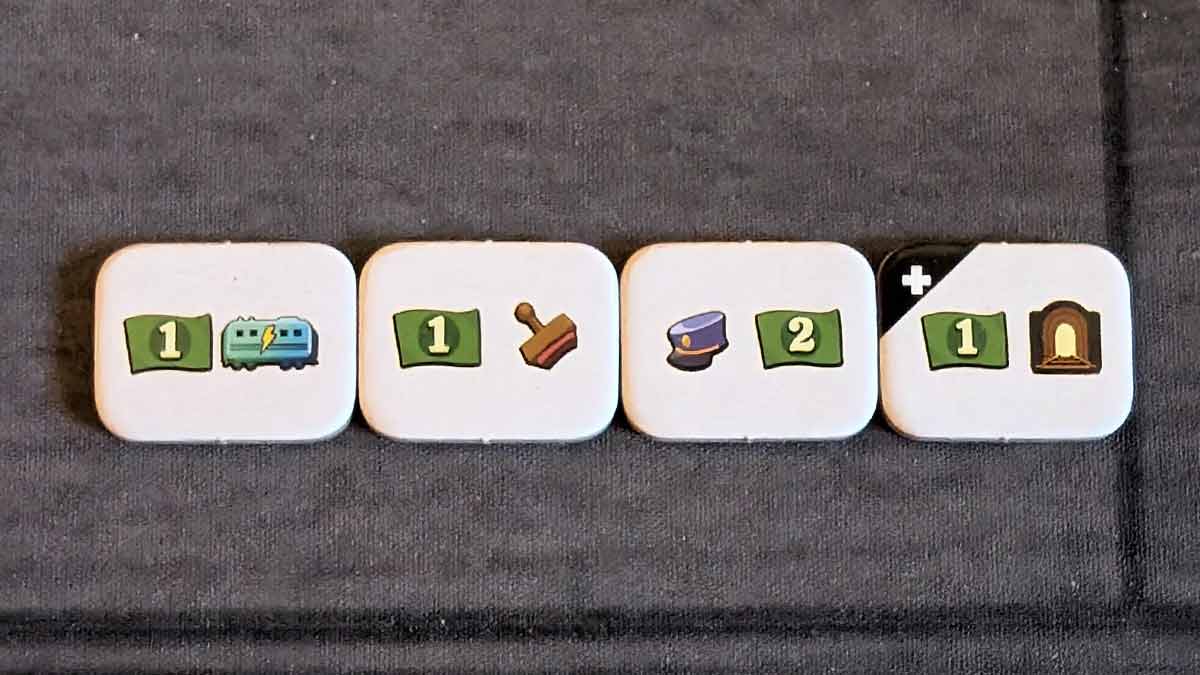
The final player components are the power or upgrade chips that players can earn as they score points.
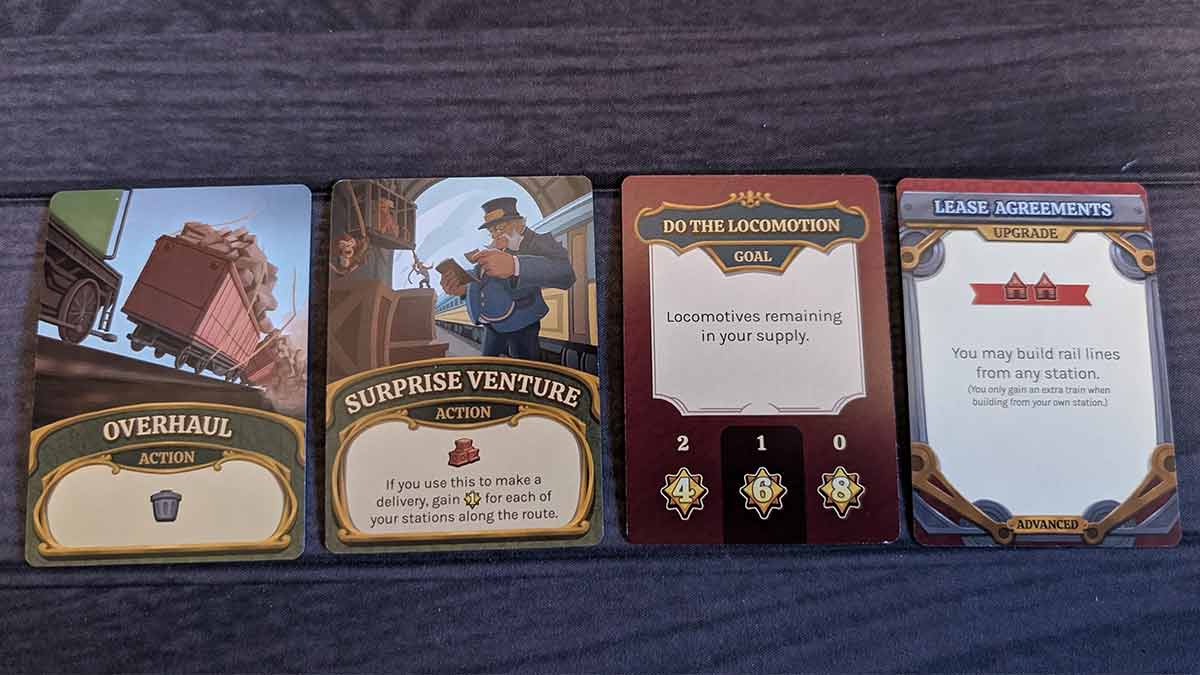
Then, there are the cards. This isn’t a card game, and there are a fairly small set of cards in the game, divided into four decks. The first is a set of 25 mogul cards, which are a combination of end-game goals and one-time upgrades. The second deck is made up of 20 action cards, which are mostly things that players will draw and use right away, although a few are more useful to hang onto. The opportunities to draw from either of these decks are rare, so players are likely to see no more than a few of the cards from either deck.
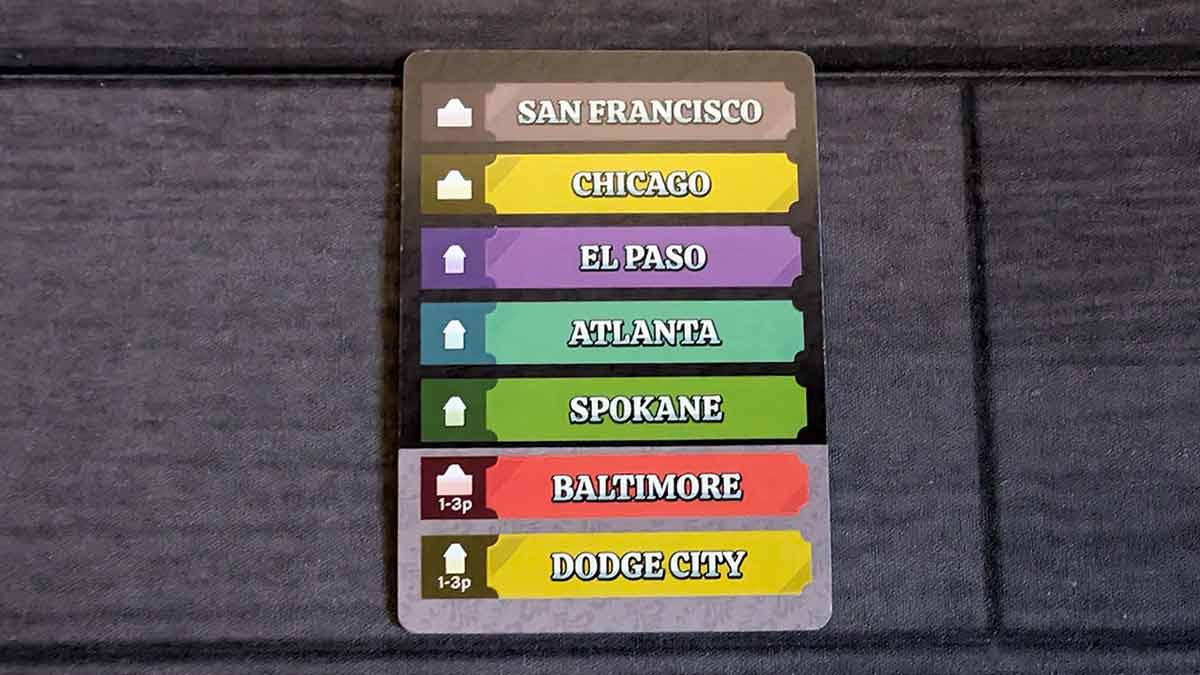
The third deck is for setup: at the start of the game, San Francisco and a set of semi-random other cities get a neutral station as a jumping-off point for building.
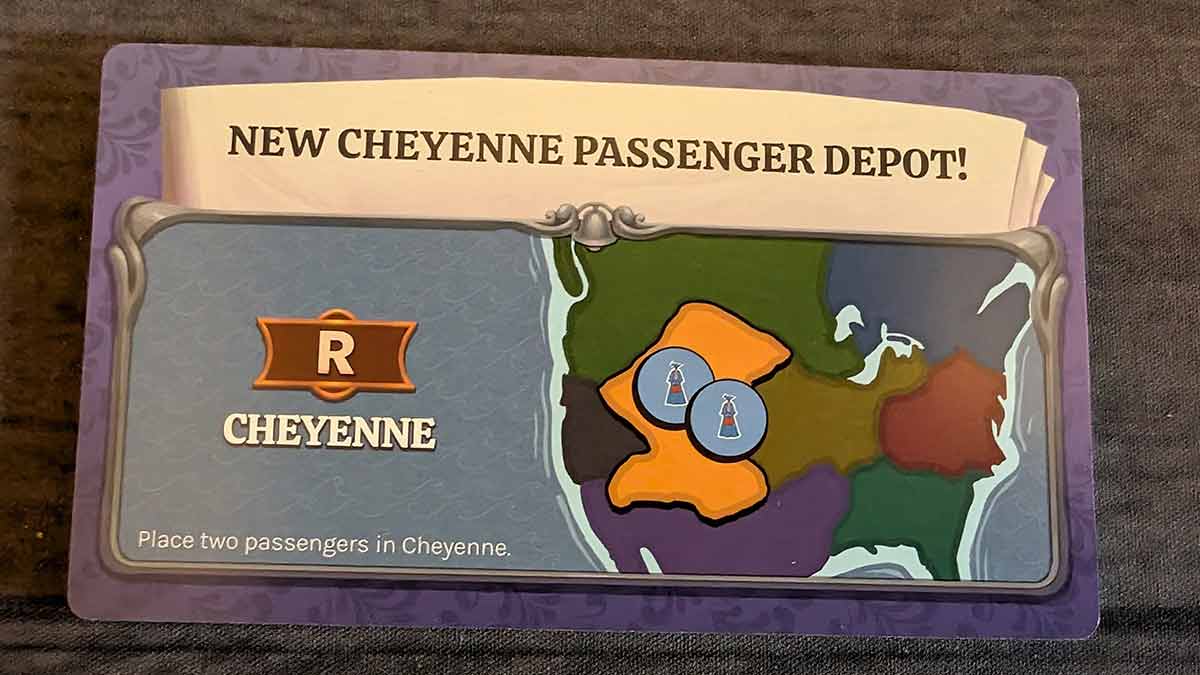
Finally, there’s a larger deck (all of the other cards are poker-sized) of 15 production cards, which are used to track the rounds in the game and add resources to the board.
There are also a set of components used exclusively for a solo and 2-player game.
How to Play Lightning Train
You can download a copy of the rulebook here.
The Goal
The goal of the game is to score the most points when the game ends. Points are mostly earned by building trains and delivering goods, but there are also end-game goal cards and some chips that give you points as well.
Setup
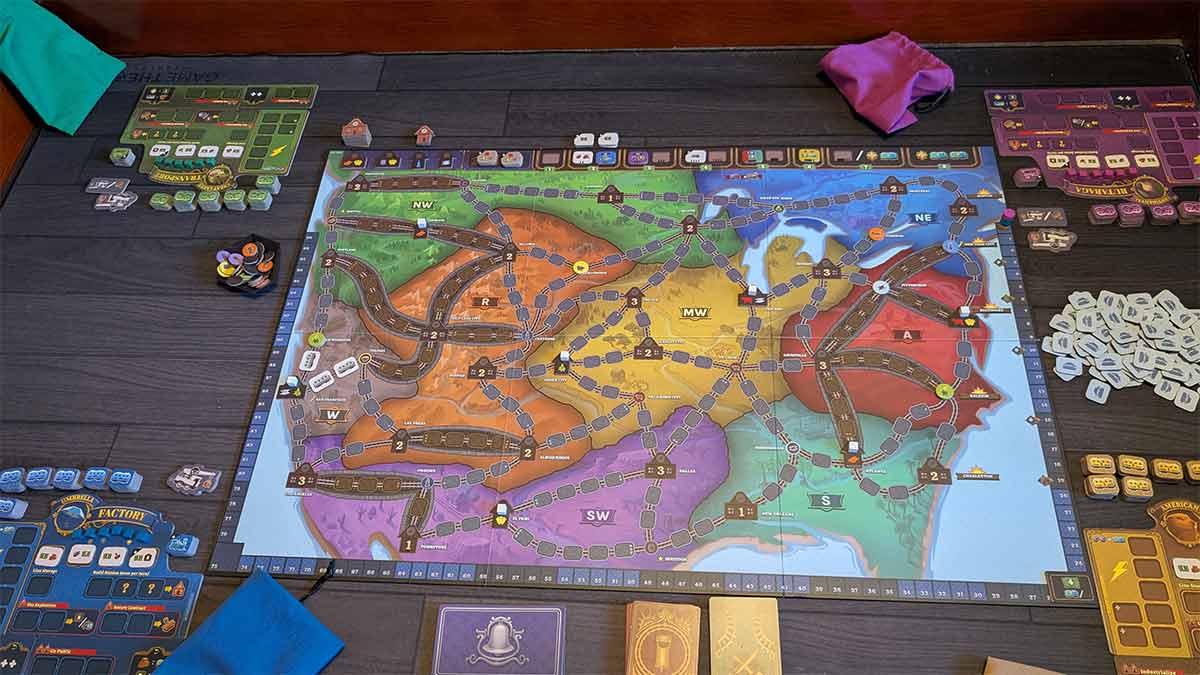
Lay the board out on the table. Make sure you have the side that matches the number of players: there’s a side for 1-2 player games, and a side for 3-4, indicated in the upper left corner. Place the Lightning Market token on space 25 of the scoring track (the lower right corner.)
Place two goods tokens on each city marked with dashed lines–Sacramento, Deadwood, St. Louis, Toronto, New York City, Pittsburgh, and Raleigh. The proper goods for each city is indicated on the board.
Create a supply of market chips by flipping them upside down and shuffling them. Then, stock the market by drawing six chips, one at a time, and placing them on the market on the spaces indicated by their cost. If a particular market space is full (each price, except 1, has space for two chips), set the extra one aside and draw a new one, then put the extra bag in the supply when finished. Stack the six $1 + chips above the 2 space. Place the loan chips in the bank to the left of the market.
Shuffle the startup deck and draw a card, then place neutral stations on each of the 7 cities indicated. Place a white cube on each station as a reminder that they are neutral. (Note that San Francisco will always be a neutral station.) In a four player game, you’ll only plave 5 cities, ignoring the last two on the card. Return all of the startup cards to the box as they will not be needed again.
Sort the remaining stations by size. Place two large and two small stations face-up on the indicated spaces in the top left corner of the board, then put the rest of the stations in a supply nearby.
Separately shuffle the action deck and the mogul deck. (It’s recommended that you first remove the “advanced” cards from the mogul deck if you’re new to the game.) Deal two mogul cards to each player, then put both decks face-down near the board.
Give each player all of the supplies of their color, along with a reference card. Players should place their board near them, with the industrialize and going public boards below the main board. They will place all five of their bonus chips in the spaces at the top of their board, and all 6 station marker cubes in the spaces indicated. They should make a supply of trains and engines near them, keeping them separated. Place the scoring marker on the zero space.
Then, they can set up their bag: place three trains (not locomotives), the three starting contracts, and the four starting money chips in their bags. Each player then shakes their bag and draws five chips and places them in the spaces on the boarding area on their player board. If they draw all three of their starting contracts, or none of them, they should return all of the chips to the bag and draw again. Repeat as needed until the starting set has either one or two, but not zero or three, starting contracts. If they draw the chip with the dollar sign and the lightning train, they will place one train in the boarding area as well.
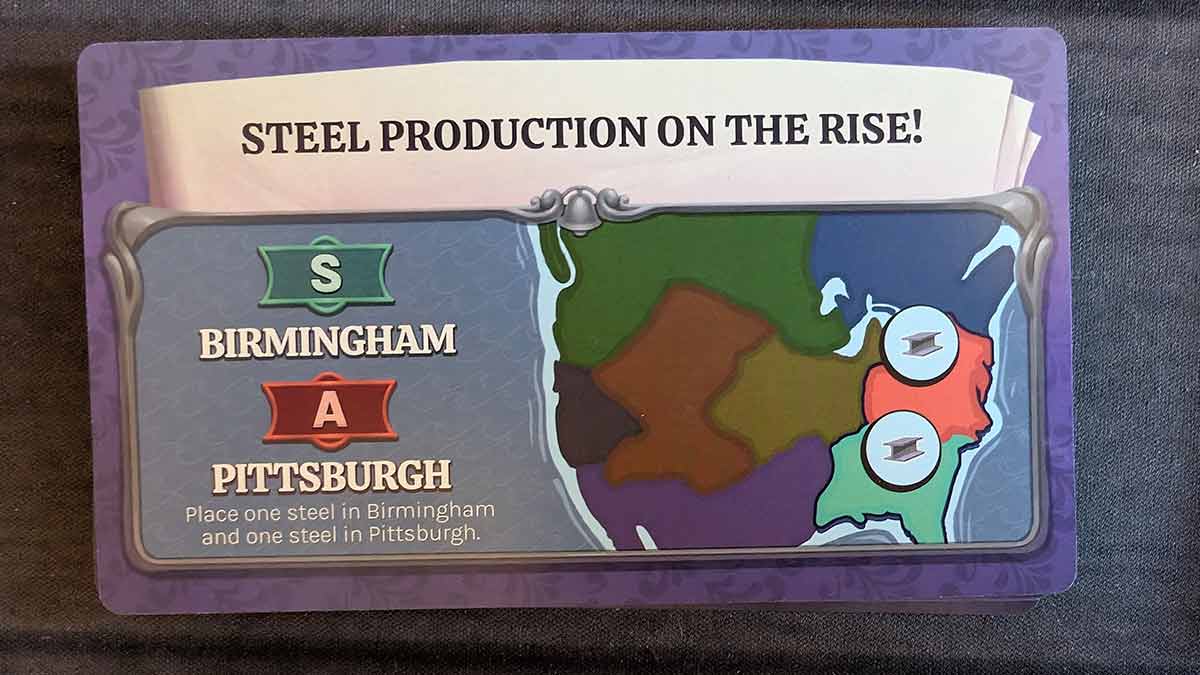
Finally, the starting player (determined randomly) takes the production deck, shuffles it, and then selects three cards and returns them to the box without looking at them. They then draw the first card. They should place additional goods on the board according to the card that is drawn. (One card does not place goods.) They will remain the starting player throughout the game.
The first and second player in turn order receive two delivery tokens. The third and fourth player receive one delivery token and one delivery/contract token each.
Gameplay
The game is played over a number of rounds. At the start of the first player’s turn, they draw a production card and place the indicated resources on the board. Then, for all rounds except the first, they check for the “award subsidies”, a catch-up mechanic that awards lightning trains to players who are falling behind on the score track. That track is divided into zones of five spots. For each complete zone between the player in the lead and other players, those trailing players get a free train to be added to their boarding area this round. Note that they can be awarded a maximum of two trains.
Each player then takes their turn by first completing an operations phase, and then a turnover phase.
In the operations phase, players spend their trains and money to perform any number of actions. Possible actions are:
- Build a rail line
- Make a delivery
- Assign trains to the railyard
- Take railyard actions
- Play action or upgrade cards
- Spend money
- Perform other chip actions.
Players can perform as many of these actions as they can afford, including taking the same action more than once. They can also perform the actions in any order.
Build a Rail Line
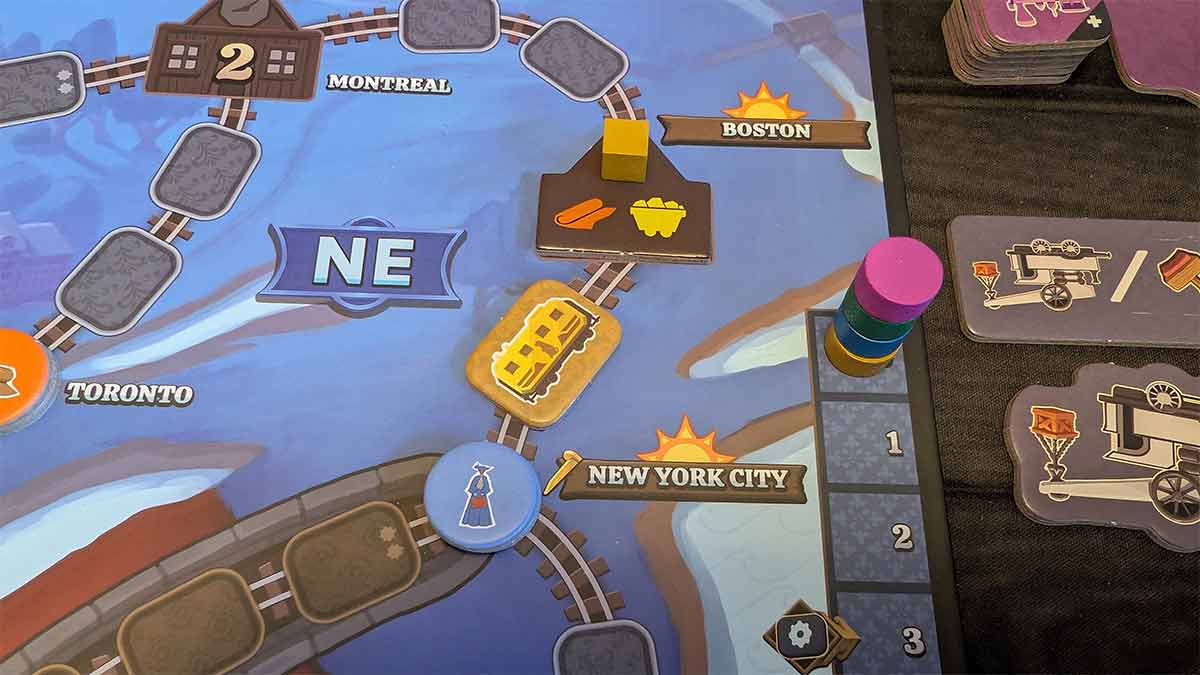
At its heart, Lightning Train is still about building train lines. Players may build lines between cities by playing the appropriate number of trains from their boarding area to the board. But, there are a few key limitations.
You may only build one rail line per turn, unless you use a special action that gives you more builds.
First, you must have a contract for the region in which you’re building. If the line in question passed from one region to another, you need a contract for either region (but not both.)
Second, you must be able to build the entire line in one turn. For example, the line between Pittsburgh and Louisville has three spaces, so three trains must be played at once there. (Yes, exactly like in Ticket to Ride.)
Third, you must build the line either from one of the starting cities (the cities marked with suns on the East Coast), or to extend one of your existing lines, or from a station you own.
Fourth, if the line is a mountain path–the lines with bricks along them–you must also be able to tunnel, either by having a chip or action card with the tunnel icon, or by using explosives.
Many, but not all, of the routes have star icons on each end. If you build one of these routes, you earn the number of points indicated.
One last thing: if you are building from one of your stations, you gain a bonus by being able to play one train from your supply to use on the line, thus reducing the cost of that line by one. If you happen to have a station on one of the one-train lines, you can build for free. However, you only get one bonus train, so if you’re connecting two of your stations, you don’t get two free trains.
Honestly, the first requirement is always going to be a struggle. You must always have a contract for the region before you build, even if you already have a station there. This is the biggest limiting factor in building lines.
Make a Delivery
All of the cities on the board that aren’t station spaces have goods. Many of them won’t actually get goods until later in the game–remember that each round starts by drawing a production card that places more goods on the board. Stations, on the other hand, have either one or two icons indicating the type of good that station needs. Making a delivery is simply that: taking goods from a city and delivering them to a station. You can make any number of deliveries per turn, but in order to do so you must have a Venture icon–it looks like three stacked crates–on a chip in your boarding area or an action card (and each icon only allows you to make a single delivery), or you need to spend (i.e., discard from the game) one of the delivery tokens you got at the start of the game.
You can also only make deliveries along completed train lines, although they don’t have to be entirely your own. To make a delivery, simply pick up the chip from the city space and move it along the connected raillines. The owner of each line scores one point, and the owner of the station at the end scores one point as well.
One other limitation: if you have a choice between lines to use, you must use the shortest line–the one with the fewest number of lines (not trains). This means that while you can pick up a chip from one end of the map and deliver it to the other, you cannot chose to use your own lines if others have built a line that is shorter. If there’s a tie–if you and another player have equal lines–then you have to use the one that contains the most locomotives (we’ll talk about locomotives later.)
Once you get to the intended station, you will flip the token facedown and use it to cover the goods icon on the station. Each station can only receive a delivery of a particular good once.
Neutral stations can also accept deliveries, the only differing being that no one scores the point for the station. In addition, there are two lines coming out of San Francisco–one to Coloma†, and the other to Sacramento‡, that can be used for deliveries but again, do not score points for those lines.
† Coloma is where, in 1848, gold was discovered on the American River, sparking the California Gold Rush and, by extension, the drive to build the Transcontinental Railroad. Since both of my kids grew up in the Sacramento region, Coloma is a standard fourth-grade field trip destination, so I’ve been there a few times. There’s a nice little museum about the discovery, but one thing that was not, and to this day still is not, in Coloma, is a railroad. It is, after all, on the American River.
‡ As a long-time resident of Sacramento, I do take a minor bit of offense to the game’s insistence that the western terminus of the Transcontinental Railroad was San Francisco. Depending on how you want to count it, the western end of the line was either the Oakland Long Wharf or Sacramento. Either way, it most definitely was not San Franciso. If you’re ever in Sacramento, you should make a point of visiting the California State Railroad Museum, considered to be one of the finest train museums in the world. While there, you’ll be able to see one of the actual golden spikes that was used at the completion of the railroad at Promontory Summit in Utah on May 10, 1869.
Assign Trains to Your Railyard
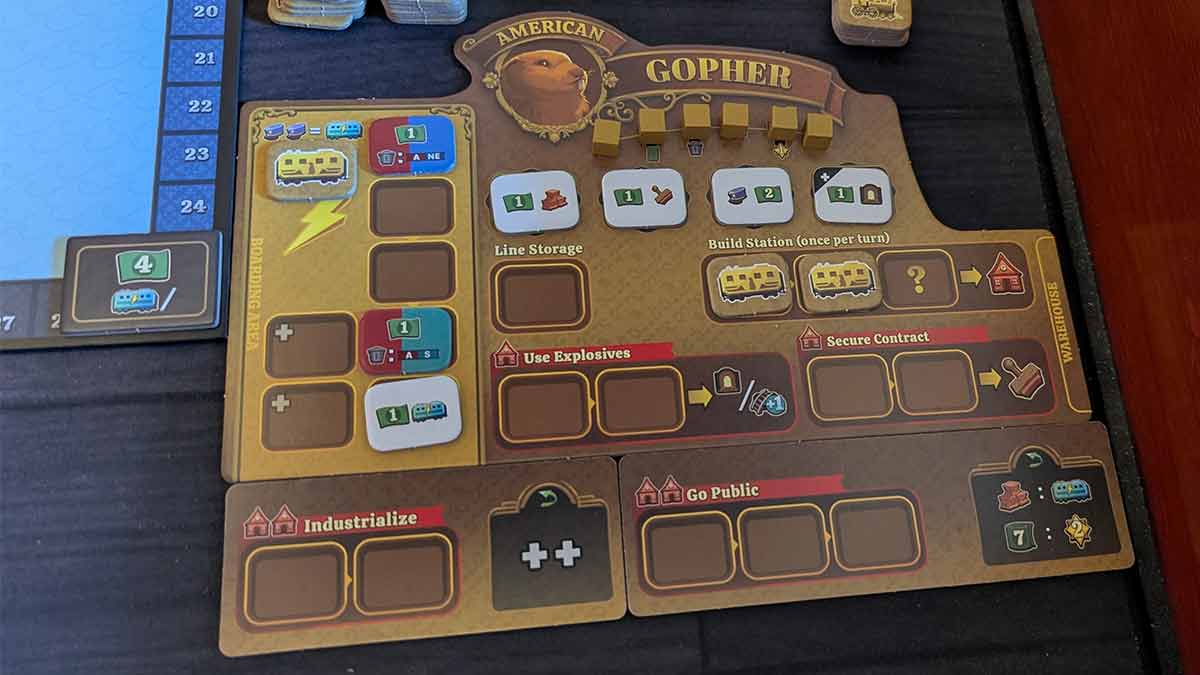
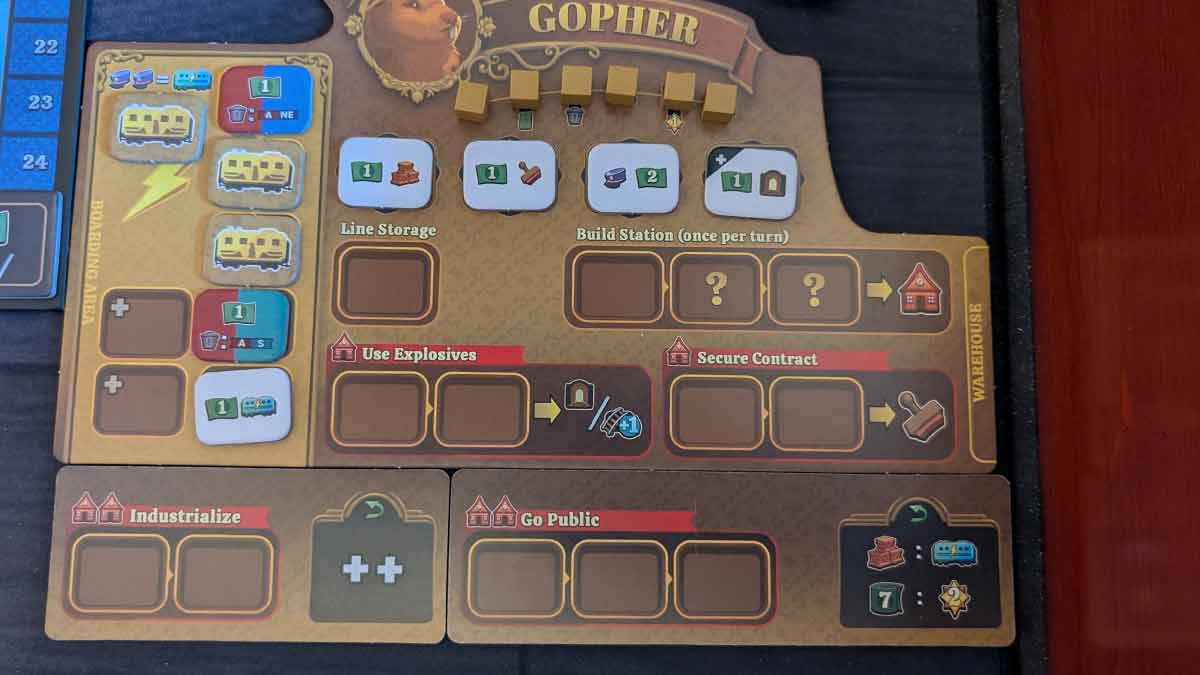
The main part of the player board is the railyard. Here, you can assign trains to use either in this turn or in future turns to perform actions.
The Line Storage space lets you park a train–either a regular train or a locomotive—to use in a future Build a Rail Line action. Note that a train can be parked here for any number of turns, but when used, it can only be used to build a line.
Build Station allows you to, well, build a station. Every station space on the board has a cost of one, two, or three trains. Depending on the station you want to build, you can put the appropriate number of trains in these spots, then move them to your warehouse–the area to the right of your player board–and place a station there. As with building a rail line, you must have a contract matching the region in which you wish to build before you can perform this action. Take the left-most cube from your board and place it on the station.
Note that as you have six cubes on your board with which to claim stations, so you are limited to six stations. In addition, the second station that you build allows you to draw a card from the action (green) deck. The third station allows you to trash any token in your boarding area or warehouse. And the fifth station lets you gain a point.
(Strategy chip: on the turn on which you are going to build your third station, take a loan before building the station, Then, when you build the station, you can trash any chip in your boarding area or warehouse, which is where the loan will be. This is one way you can in essence get a free loan.)
I should mention here that all three of the starting contracts are of somewhat limited use. You’ll find that the stations and routes on the East Coast fill up quickly. Thus, these all have a built-in mechanic to keep them from polluting your bag: once used, these three tiles are immediately trashed. There are other ways to get contracts, so losing these tiles after their first use really is a good thing.
Secure Contract allows you to claim a contract on any region of the board, regardless of your chips. You’ll find that getting contracts is the number one thing that will limit your ambitions, so taking this action is very helpful. However, there is one limiting factor: you must have built at least one station in order to place trains here or use this action. Note that when you use this action, you earn a contract in that region for the entire rest of your turn, so you can as many build stations and rail lines as you want.
Use Explosives also requires that at least one station has been built, and it allows you to choose one of two actions. You can either take a second build action (remember that you are otherwise limited to a single build action per turn) or you can gain the tunnel effect, which lets you build on those mountain paths.
Note that with all of the above, you can park trains on these spaces. So, if you only have a single train left to use, you can simply place it on, say, the build station space. On subsequent turns, you can then add to them. But even when they fill up, you don’t have to use them right away.
Also, when you take any of these actions, you move the trains you’re spending to your warehouse. That clears those spaces, and they can be used again this turn. For example, if you had enough trains, you could put two on the Use Explosives spot to gain the tunnel action, move those trains to your warehouse, then put two more trains down to gain the construction action and build on a mountain line (assuming, of course, that you have enough trains to do that.)
The final two places to use trains in your railyard are the two upgrade boards at the bottom. Industrialize gains you two additional + spaces, which in essence let you draw more tiles (see the description of the Turnover phase below.) You must have two stations on the board to place trains here, and it costs two trains, but once you do this you flip the board over to gain those spaces.
Going Public likewise requires two stations, and it costs three trains. Once you spend them and flip the board, you gain two permenant effects for the rest of the game. One is that every time you draw a tile with the Venture icon (the stacked crates), you immediately gain a lightning train. (You also gain this effect immediately when you first flip the board over.) The second is that you will gain two points every time your tiles generate 7 or more dollars.
Play Action and Upgrade Cards
Action cards generally provide you with one-time benefits. They can be played, and the benefit earned, at any point in any turn. They are then discarded.
Mogul cards give you either some kind of upgrade–an ongoing, permenant benefit from the moment you play the card–or end-game points (basically, an end-game goal.) You have two of these cards from the start, and there’s no real reason not to play upgrades as soon as you can (note that some upgrades have a minimum number of stations before they can be played.) End-game bonus cards are held in your hand until the end of the game.
There are very few points in the game where you actually get to draw a card, so use the few you have to your benefit. When you reach 19 points, you will be able to draw a new card from either deck and then discard a card, so while there’s no penalty for having a useless card in your hand at the end of the game, you will have a chance to dump one during the game.
Spend Money
Lighnting Train is a bag building game, and the way you buy more chips to add to your bag is by spending the money you earn each round. The market will always have exactly six chips out, and you can buy any or all that you can afford. Any money you don’t spend on a turn is lost. If you trash a chip because of an effect during the turn, you still get the money from it.
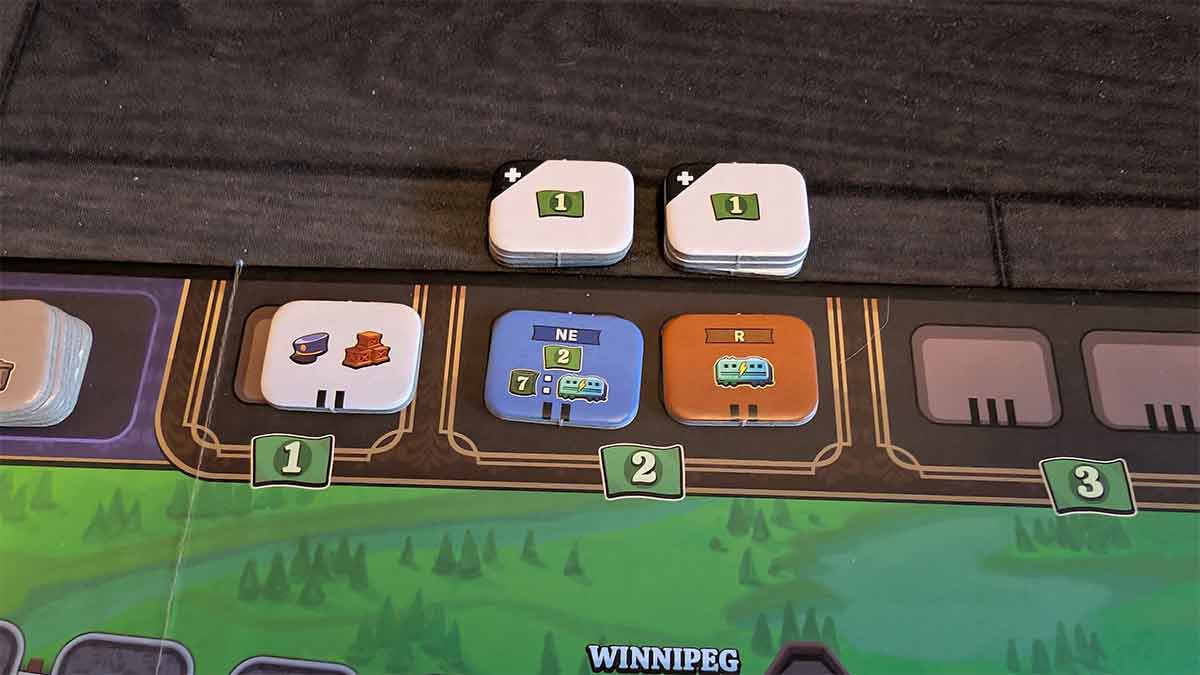
Every time a chip is purchased, the market is refilled immediately. (So you can buy a chip and wait to see what it drawn to replace it before buying more.) The initial cost of the chip is indicated by the markings at the bottom. But, in one of the game’s more unique mechanics, restocking the market only causes existing chips to become cheaper some of the time. When placing a new chip, it is placed in the leftmost spot in the appropriate compartment. Only when a compartment is full–when there are two chips in it–and a third chip for that price is drawn are chips slid to make room. But, you only slide chips that have to be slid, so generally, you’ll only see things get cheaper once every several turns, and as there are always a maximum of six chips out, there will always be empty slots. If the 2 comparment fills, one chip will move into the 1 compartment, there are no chips that start with a cost of one, so this is the only way a chip can cost that little. If that chip gets forced out of the 1 spot, it is trashed (removed from the game.)
Players can always choose to purchase one of the 1 + chips for 2 dollars. These give you a single dollar, but are + chips that don’t fill slots.
Players can also take a loan from the bank whenever they choose. To do this, they take one of the bank loan chips. It gives them $1 for this turn. It does nothing else, so it is basically bloat in your bag. When it’s drawn, it can be trashed for $4. If it’s still in your bag at the end of the game, it’s worth -2 points. (I will note that there are other things that allow you to trash chips, so if played carefully a loan isn’t always terrible.) It’s also worth noting that if you have an effect that is triggered by earning $7 (such as the one provided by Going Public), this is only triggered “naturally” by the sum of your chips, and cannot be made up with earnings from a loan or from cards. Finally, you can only take one loan per turn.
There are several permenant spots on the board at $7 and $8. Also, once someone reaches 25 points, the marker on that board at that spot is added and provides the ability to purchase a lightning train for $4. Which brings up an interesting note: in most bag and deck building games, you do your turn, then purchase. In this game, though, this action, like all of the others, can be taken at any time. That meanst that if you have $7 or $8 early in the game, or $4 later, you can spend your money early in your turn to get an extra lightning train, which can be immediately used that turn.
All chips you buy are placed in your warehouse and can only be used once you eventually draw them from your bag. However, if you buy a chip that has a conductor hat on it, you will also immediately place a locomotive from your supply and add it to your warehouse as well.
Scoring Track Bonuses
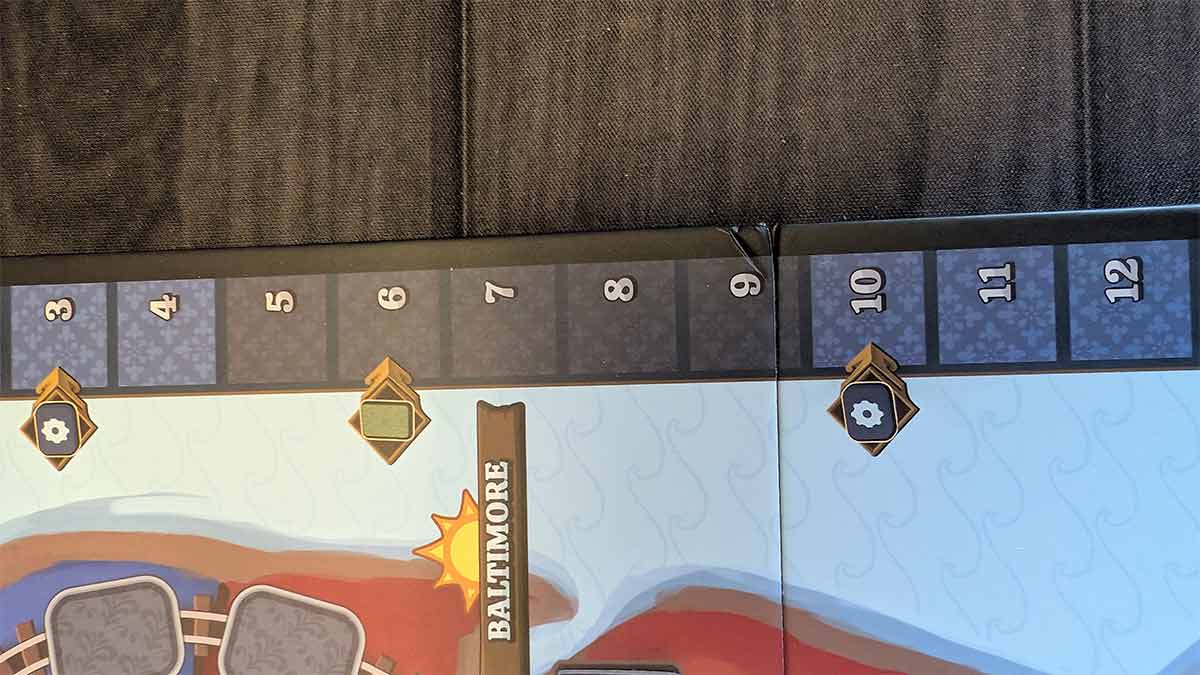
As you earn points, you will unlock bonuses based on the spaces you pass on the scoring track. When you first earn 3, 10, and 15 points, you can any one of the bonus chips on your board and place it in your warehouse. Note that you have four chips but only earn this three times, so you have to pick which bonus you don’t want.
At 8 points, draw a (green) Action card.
At 19 points, if you have a card in your hand, you can draw either a red or a green card, and then discard a card (including the one you just drew) to the discard pile.
And as was mentioned, the first player to reach the 25 point marker places the lightning train bonus tile on the market, meaning that at any point from then on any player can spend $4 to buy a lightning train.
Should any player manage to lap the board and get more than 100 points (and I should mention that in the times I’ve played, no one has scored more than 40 points) you do not get these bonuses on your second lap.
Turnover Phase
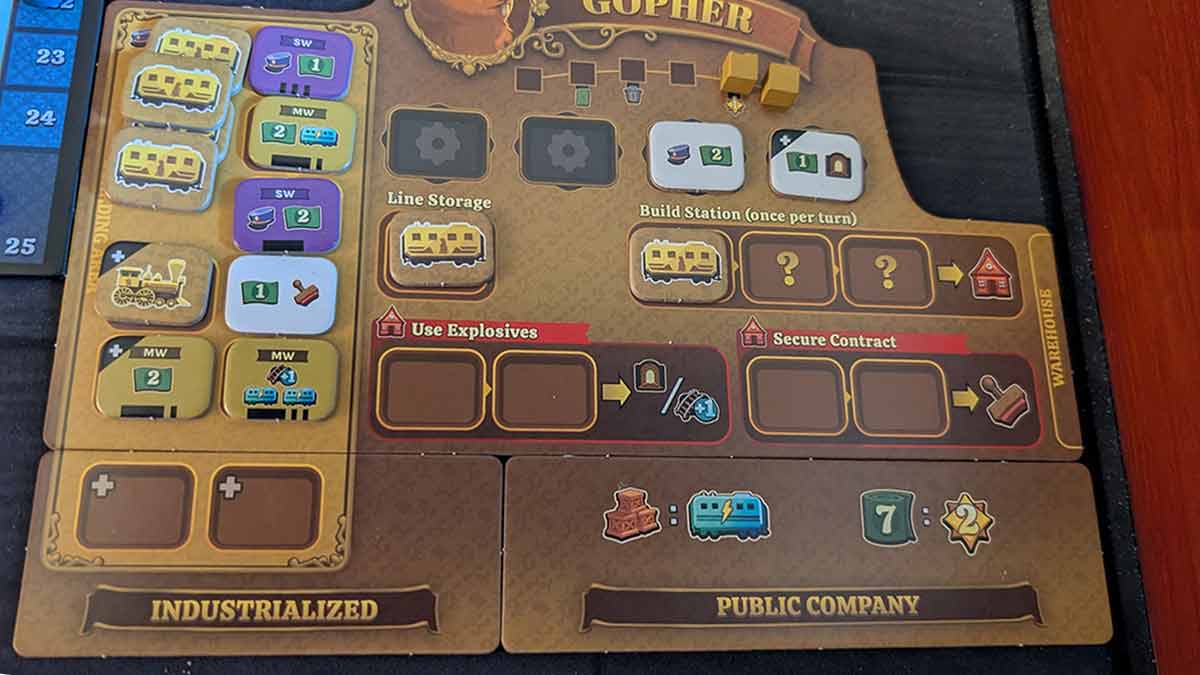
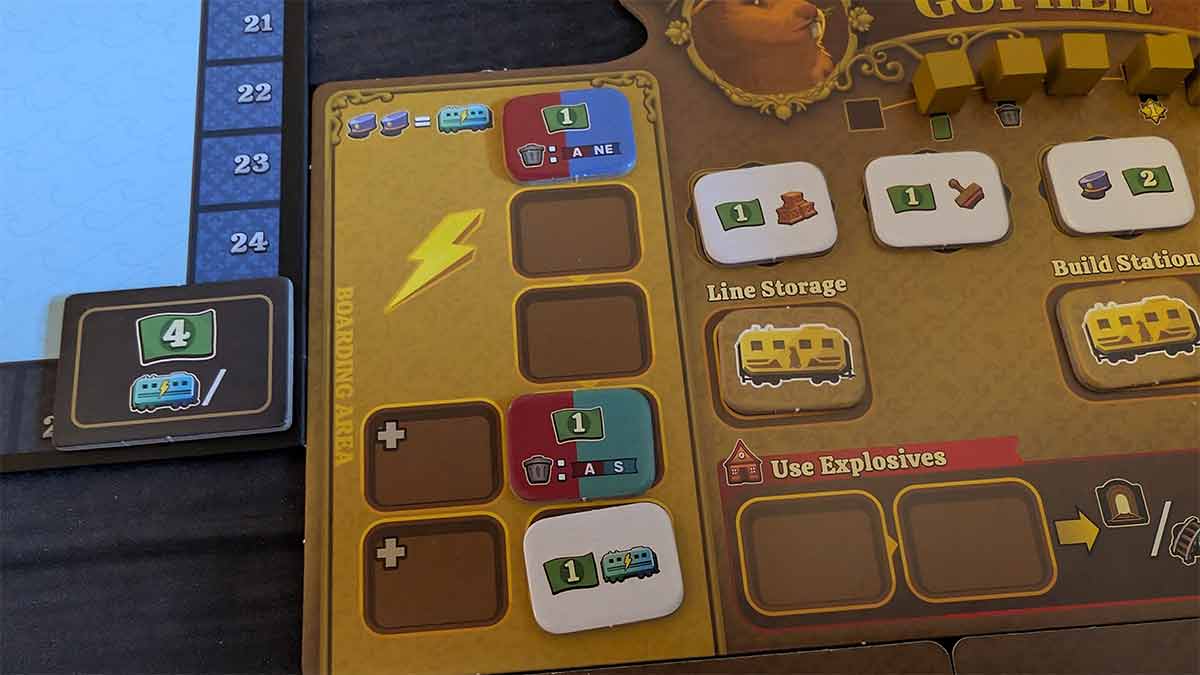
Once you’re done taking actions, there’s one final thing to do on your turn. (And while the rules don’t call this out, I do suggest that the next person start taking their turn while you do this.) First, put any money chips that are still in your boarding area in the warehouse. (All of your trains and locomotives should have been spent on your turn.) Then, draw chips from your bag. Your boarding area has five basic spaces on it, and you must fill those one at a time. However, you also start with two + spaces (and if you industrialize, you’ll get two more.) Any chip with a + on it (all locomotives, as well as a good number of chips you’ll buy from the market) are instead placed in these spots. You keep drawing chips, one at a time, until the five basic slots are full. (It is important to draw chips one-at-time, because the order in which you draw the + chips will matter.) Note that if you fill up all of the available + spots, additional + chips will have to use a basic spot–this is the reason why it’s a good idea to industrialize early.
In the image above, Gold is going to have a good turn next time. They were able to draw six chips thanks to the MW/2 chip going in a plus space. In addition, they got four lightning trains: two for the MW chip (which also gives them a bonus build action), one for the MW chip near the top, and one for drawing two conductor hats. They also score two points, because they have gone public and drew chips that gave them seven or more dollars. They also have a train already banked on Line Storage and another on Build Station from previous turns.
Lightning Trains
I’m honestly not at all clear as to why the game is called what it is, but in-game, lightning trains allow you to add more trains to your bag. Again, the key way you get points is by building lines and then using those lines to make deliveries, but as you build lines, you permenently lose the trains used to build the line. And since you also need trains to do the railyard actions, you need a steady and ideally ever-increasing supply of trains. And that’s where the lightning trains come in.
Anytime you draw a tile with the lightning train icon on it, you will add one train from your supply to your boarding area. These go in the space to the left of the basic slots, and there is no limit to the number of lightning trains you can add on a turn.
You also add a lightning train to your boarding area any time you draw two chips with conductor hats. If you’ve gone public, you also add one any time you draw a chip with the Venture (stacked crates) icon.
These trains can be used for anything that any other train can be used for in this round, and will eventually go back into your bag.
Refilling the Bag
Anytime you need to draw a chip and do not have enough chips left in your bag, you’ll take all of the chips from your warehouse, put them in the bag, and then continue drawing.
The Transcontinental Railroad
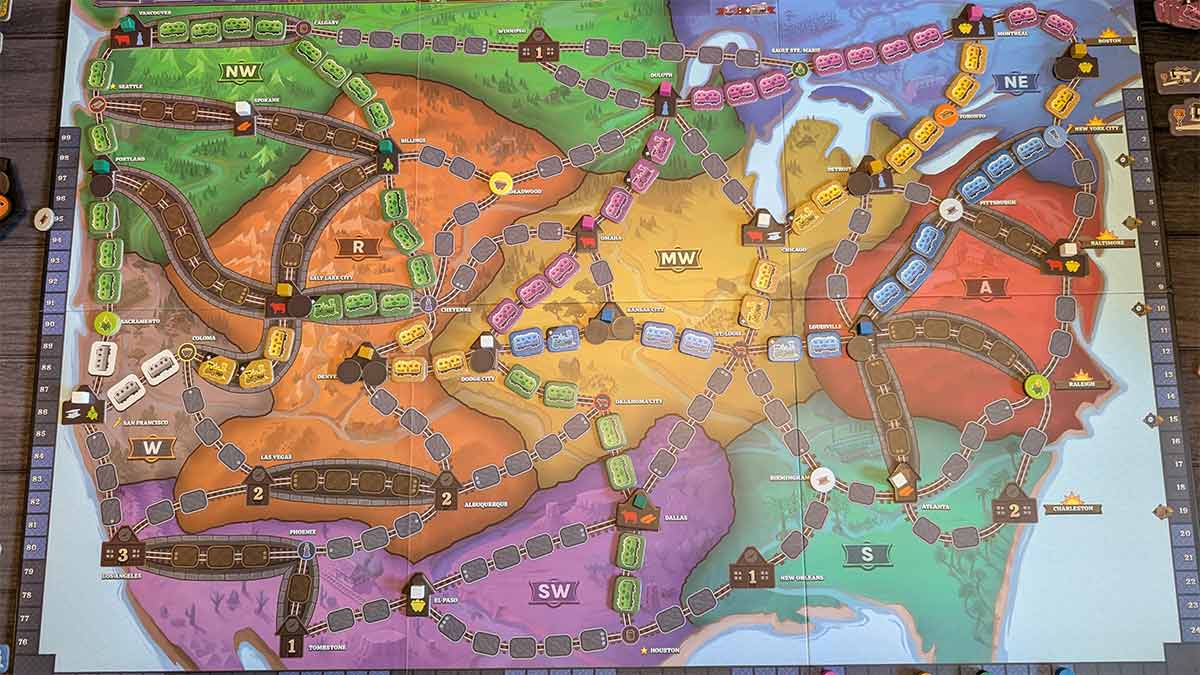
The Transcontinental Railroad is completed once any path linking New York City to San Francisco (sigh, ‡) is completed. As soon as that happens, the game is paused monentarily and the railroad is scored. Count, using the fewest number of lines (it’s possible that the final link might make 2 or more paths complete) the number of locomotives on the line. Each locomotive scores the player two points.
In the image above, all four players have contributed to possible routes. However, only the shortest will score: in this case, NYC->Pittsburgh->Louisville->St. Louis->Kansas City->Dodge City->Denver->Cheyenne->Salt Lake City->Coloma->San Francisco. Blue has two engines on that route and scores four points. Gold has two engines (likely, the final line played to complete the route) and scores four. Green has one and scores two, while purple was shut out.
Note that there are basically three key uses for locomotives. First, they are + chips, so they are trains that do not take up a basic spot in the boarding area. Second, they are the only ways to score points on the Transcontinental Railroad. And third, they are the potential tie-breaker for determining delivery routes.
Game End
The game ends when one of two things occurs.
First, the completion of the Transcontinental Railroad and it being linked to either Seattle or Houston (in a four player game, both cities must be linked to the Transcontinental Railroad.) Once this occurs, players finish the current round and the game is over.
In the image above, that condition has been met: the Transcontinental is complete, and both Seattle and Houston are linked to it.
Alternately, the game is played for 12 rounds. The production cards track this, since there are 12 of them. When the 12th is revealed, the game ends at the end of the round, regardless of the state of the Transcontinental Railroad.
After this final round, every player can attempt to make one final delivery, in turn order. Remember that each station can only take a particular good once, so one player delivering to a station means no one else can deliver that good to that station. Remember as well that deliveries must always use the shortest path, so a last-turn strategy might be to try to make a connection that take away a long potential delivery from another player.
If anyone has mogul cards with end-game bonuses, those are now tallied. The player with the most points wins. Any player who still has a loan loses 2 points per loan.
If there’s a tie, players share the victory.

Lightning Train is GeekDad Approved!
Why You Should Play Lightning Train
I’ve described this game to multiple people as “Ticket to Ride, but with bag building.” Since I am a big fan of TTR, and since I do like bag building games, I was definitely pre-inclined to like this one, and I haven’t been at all disappointed.
While the name is still confusing (I’ll be honest that when I first saw the game, the name combined with the graphic on the box definitely led me to believe that there would be some kind of magical or fantastical element, and, spoiler, there isn’t) tht game offers a great array of tactical and strategic decisions sure to keep fans of heavier games entertained. At the same time, it’s not so complex as to turn off folks (my wife included) who really don’t want to deal with a million things at once.
The train building element is fairly straightforward and will remind folks of the huge number of other train building games. But, I did like the addition of the mountain passes, and the mechanic to build them–dedicating trains to the Use Explosives action–is much easier to remember and track than a lot of similar games that require some formula of extra moves or actions to perform. The limitations on building, though, are where things get interesting. Yes, you can only build one line per turn (most of the time,) and you have to build from either your own station or on to your own line, but both of those are pretty standard elements in games like this. What creates the interesting limitation is the requirement to have a contract for the region you’re building in. That turns out to be the hard part. It’s not a simple matter, as it normally is, to say, “I’m just going to start in some city and build out from there,” because if you don’t have the right contracts, that’s impossible. Instead, what you will find yourself doing more often than not is deciding to build a station somewhere you hadn’t really planned to just because you happen to have that region’s contact tile that round, and so by building the station you can also build the rail line.
The bag building aspect of the game is likewise altered by the lightning trains. Initially, it seems like a hard choice: do I build a rail line and thus permentantly remove those trains from my bag, or do I hold off so that I can have enough trains to do the actions I want? But, you’ll quickly discover that you’re adding one or two trains to your boarding area almost every turrn–there are a lot of tiles that give you lightninig trains–and so you’re unlikely to really run out. But, by having those trains be both the workers that you use for the railyard actions and the trains you’re using to build the lines, it’s very difficult to get yourself in a situation where you don’t have enough trains to keep working towards your goal, while also not having too many trains where you’re unlikely to draw nothing but them, and thus not have other tiles for either other actions or for money.
Providing the ability to leave trains in the railyard between turns also removes a common frustration of bag- or deck-building games, where you might go several turns without drawing what you need and start to feel like you’re falling behind. While, yes, carefuly management of what you have in the bag is an element of the strategy of the game, it rarely becomes a problem here.
I’ve had the opportunity to play the game several times with several different groups, and can attest that it remains a really fun game. It’s long enough to be an interesting game without being so long that it prevents you from playing anything else, and it really hits the sweet spot of being complex enough for serious gamers without becoming so complex that it turns more casual participants away. I think it’s going to find its way to my table a lot this year, which is the main reason I’m giving it the GeekDad Approved designation.
Click here to see all our tabletop game reviews.
 To subscribe to GeekDad’s tabletop gaming coverage, please copy this link and add it to your RSS reader.
Disclosure: GeekDad received a copy of this game for review purposes.